Lock any app on iPhone, iPad without any third-party app [Step-by-Step Guideline]
App locking on
iPhone/iPad/Mac, while not directly built-in, can be achieved through various methods.
Apple's Screen Time offers content and privacy restrictions, allowing you to
limit specific apps or categories. You can also utilize Guided Access,
essentially putting the device in a single-app mode with additional security
measures. However, for granular control over individual apps, third-party app
lock options exist on the App Store. These typically require passcodes, Touch
ID, or Face ID to access locked apps, providing an extra layer of security for
sensitive data. While native app locking functionality might be missing, iPhone/iPad/Mac still offer workarounds and dedicated apps to keep your private
information and favorite apps protected.
So today I am going
to show you how to lock any app on your iPhone, iPad, Mac without any
application installation. There are many ways to lock apps on an iPhone, but
the best and easiest way is what I am going to show you today.
Follow the Step-By-Step guideline, and you will be
able to lock your apps too.
For this, you need
the “Shortcuts” app on your mobile;
if not installed, it’s a free application.
Click here to download.
Step 01
Open “Shortcuts” app.
Step 02
Click “Starter Shortcuts" under the
shortcuts section.
Step 03
You need to create a
shortcut, so click the “+” icon to
create a shortcut.
Step 04
Then, click the “Add Action” button, search for “Lock Screen,” and click it.
Step 05
No “Done.” Your shortcut will be there.
Step 06
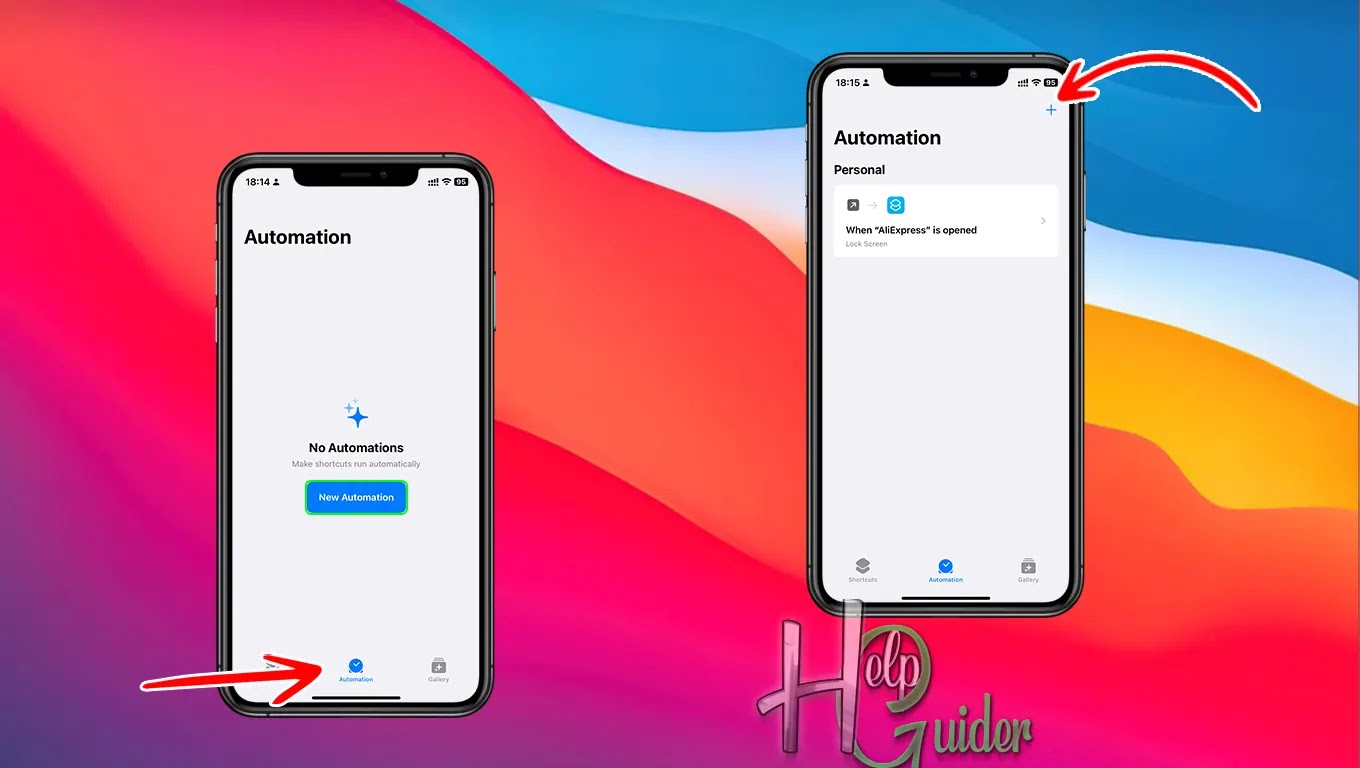
Now go to the “Automation” section and click “New Automation” or click the “+” icon to create a new one.
Step 07
Scroll down or type
and search for "App,” then
click it.
Step 08
App section click “Choose” and select the app(s) you want
to lock. I have here selected two apps. (Select multiple apps to lock apps),
then click "Done.”
Step 09
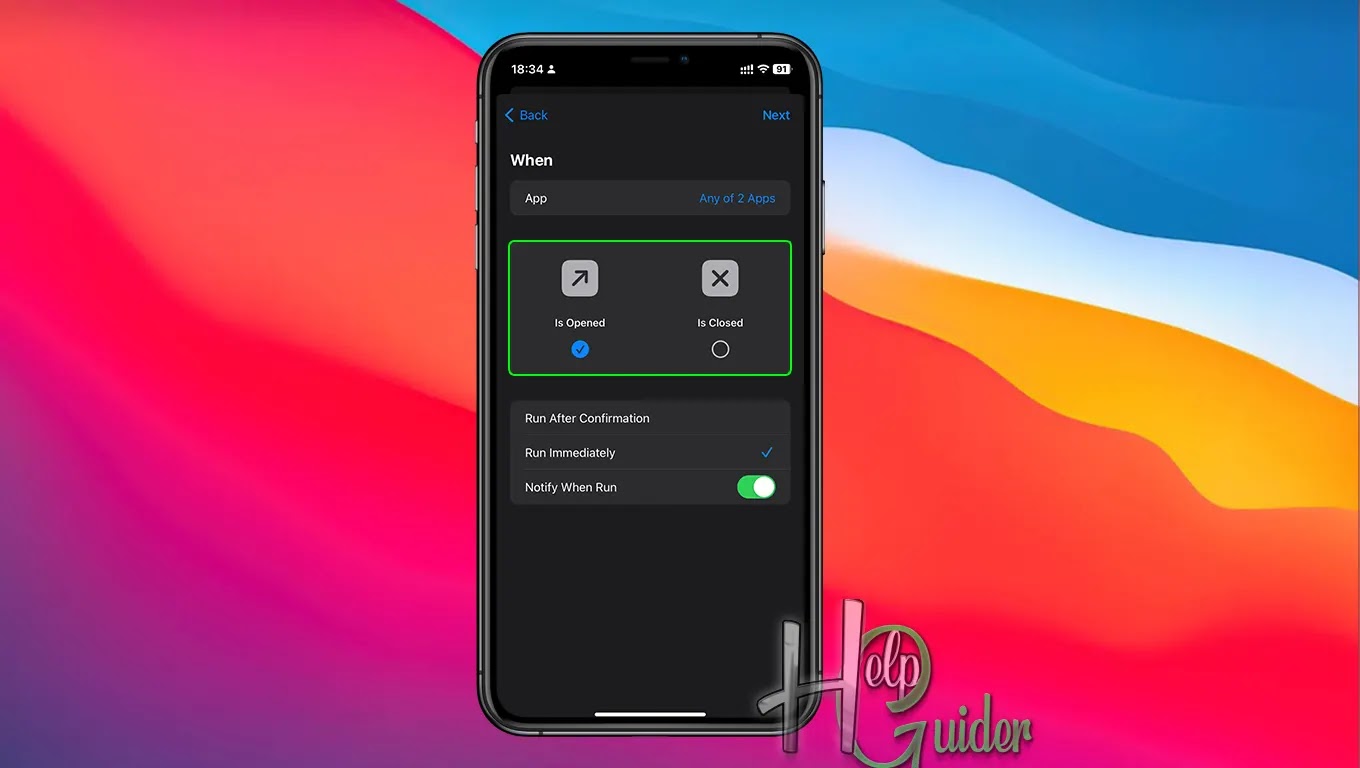
In the next section,
when you want to perform it, you want to lock the app when it opens. When the
app opens, it should be performed, so check only “Is Opened.”
Step 10
In this section,
click “Run Immediately." It
will not ask for your confirmation to start. You can turn on “Notify When Run," and when someone
tries to open it, you will get a notification. So you can check the time when
it happens. Then click "Next.”
Step 11
Here, under "Starter Shortcuts,” click the shortcut
that we created. (Step 05)
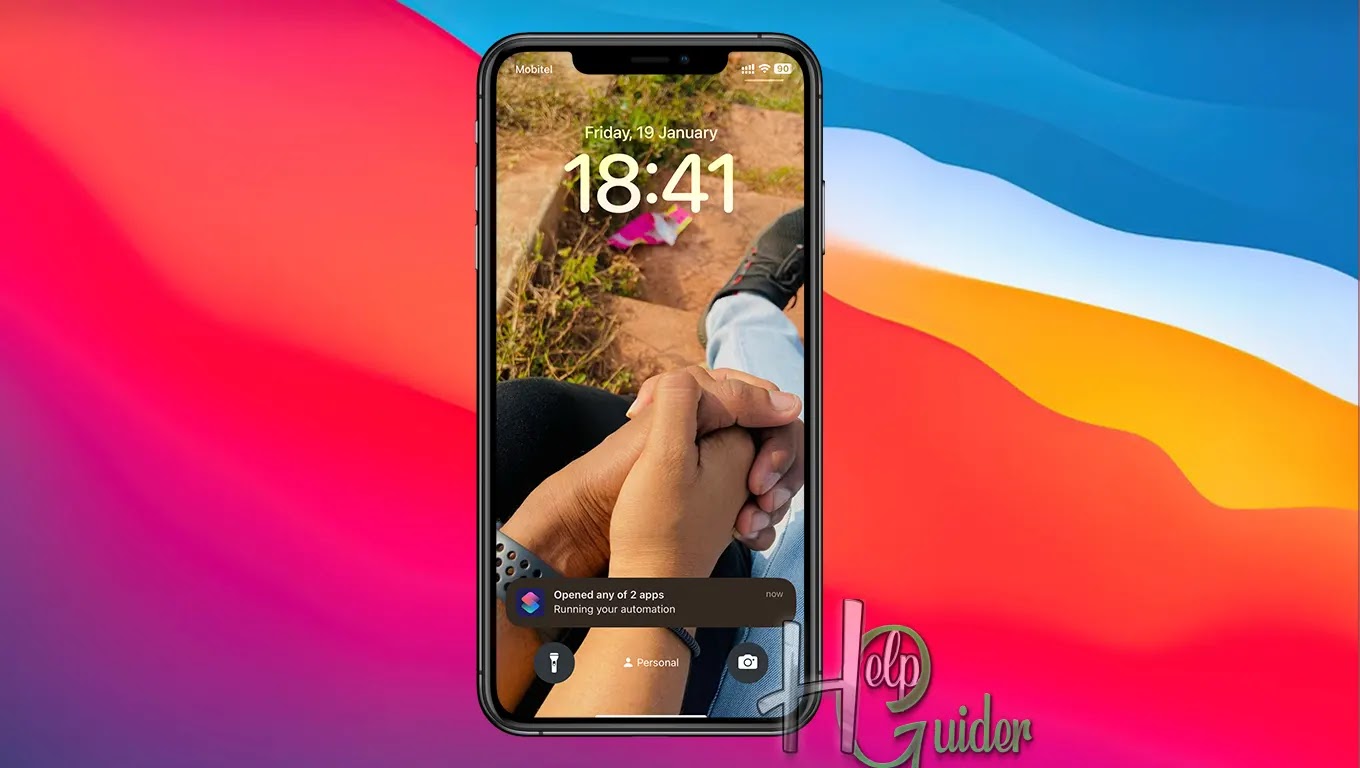
Now that everything
is set, when someone tries to open any app that you lock, the iPhone will be
locked. You will receive a notification. Face ID or the password is needed to
unlock the iPhone.
I hope you learned something here, and I am
sure now you can give your iPhone to anyone to use without worry…
Good Luck!


